Showing posts with label Valentine's Day. Show all posts

Sunday, February 14, 2010

The Valentine Date


I posted my FIRST date on "The Dating Divas" blog....a place where my friends and I share the creative dates we take our hottie husbands on!  :)  

Click here for the date I surprised my husband with...
Saturday, January 30, 2010

My FIRST Freebie.....JUST 'Cuz I Luv Ya!!

As my friends & I have been working on our FABULOUS secret project...the suspense is KILLIN' ya, huh......one of them told me about the awesome blog called, "Love, Actually."

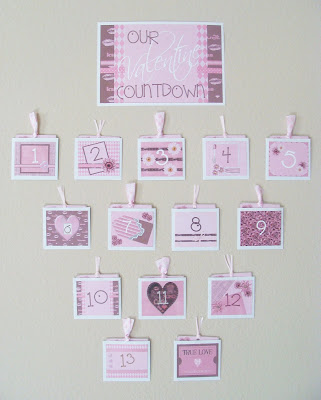
Where have I been and WHY did I not know about this gal?? I checked out her stuff and discovered a darling Valentine Countdown she did for her hubby! I loved the cute little ideas that she thought up as the "daily activities, etc."....so I quickly whipped up my OWN Countdown....and then I decided to email my pdf files out to all my girly friends who decided to help me out with my NEW secret project. I THEN thought....why not share it with all of my loyal readers?? So....wa-lah! There you have it!

Here's the FINAL project....after everything was assembled....and on the wall. Our wall is not gray...it's actually TAN....ya think I need a new camera?? {WINK} It's basically a countdown of CUTE things we will do together or for each other that day.

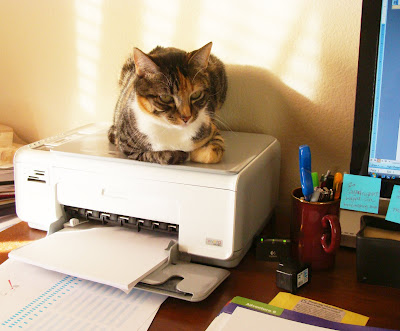
Someone was WATCHING me as I designed all of this on Photoshop!
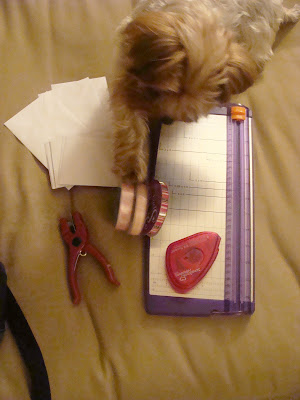
Materials Needed:

-My downloads (See Below...)
-A cutting board (or scissors)

-Adhesive (I used Scrapbooking Tape)

-A hole punch

-Some pink or white ribbon
-Seven white envelopes (not the long ones) SIZED: 3 5/8 x 6 ½
-A cute puppy that will try to steal your ribbon….
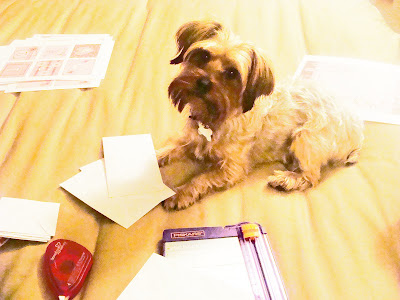

He has to be in the middle of everything!!
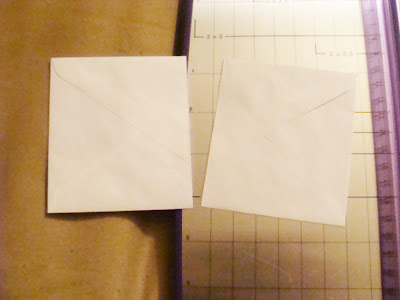
Seal the envelopes & cut them in half like you see above...

I cut a tiny white border around my sign... (see the first pic)

Download Sign HERE!

Cut out the number cards...that you will be attaching to the front of the envelopes...

Download Number Cards HERE!

I made the cards that will go inside the envelopes....but since the gal from "Love, Actually" is selling her cards, I didn't feel right about offering that part for free. SO - you have three options:

#1) Go to her blog and purchase her darling cards for a great price HERE.

#2) Download my pdf file and then you can write on them - HERE.

#3) Download my word doc and then you can type in your stuff in word - HERE.

P.S. If you choose to download the word document...so you can type in your own "daily to-do's" here are some HINTS! After opening the document, click on Insert (at the top) and then text box. Sometimes an annoying box automatically appears on your page, ignore it and draw a bow on the first blank card. (You do this by right-clicking on the mouse and then holding it down as you size your box.) NOW - here's the hint ...you will find that the box is white and it covers up the lovely design of the card...you can fix that by right-clicking on the box (it has to be on the line), when a new screen appears, click on Format Text Box. On THAT screen under the subtitle, "Fill" you will see the word, "Transparency"....and a slider bar next to it. Click on that bar and slide it ALL the way to the right. NOW - you will be able to see the design. Oh - and don't forget to change your LINE...to "No Line." Click OK to save everything. Good Luck!
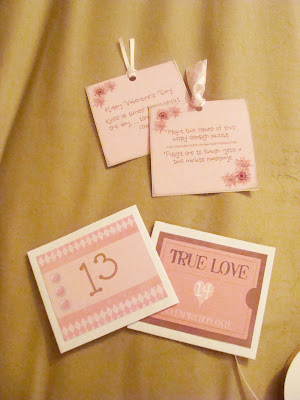
Cut out the cards, punch holes in the top, and tie the ribbon on. You are ALMOST done!! All you have left to do is TAPE it on your wall (I put it in our bedroom) and surprise your honey!!

Oh yeah...I LOVED Ms. Love Actually's cards...so I just typed up her ideas on my cards. One of them involves a word search....and of COURSE I had to "cute-si-fy" it...so here's the download for that:

Valentine Word Search - click HERE!

Enjoy!! I am hoping to be posting about our SURPRISE on another week....check back the MONDAY before Valentine's Day.....

Wednesday, February 18, 2009

Photo Tile Idea....and a FEW Leftover V-Day Ideas...


Crafting Chicks posted a LONG post that included ALL of these ideas.  She includes more info on her blog....just click on the link.  I really liked the photo tile idea above....but then wanted to "file" the remainder of the ideas for the future!  Fun, fun!!  OH - and she hooks us up with FREE templates!  Nice, huh!!


Tuesday, February 17, 2009

Scrapbooked Flower....In A Pot!

Pursuit of Craftyness made this l'il flower.  I fell IN LOVE with the leaves.  Silly, huh!  Well, just click on this photo to make it larger.....and you just MAY see my point!  If you click on her link, she gives more details on what materials she made, etc.  

Monday, February 16, 2009

Some WOOD V-Day Crafts....

Little Miss Crafty Pants made ALL of the crafts below!  Since my CURRENT "love" is wooden crafts...I gasped with delight and quickly asked her if I could post them.  I simply adore the "XOXO" blocks!  Maybe next year....sigh...


Wait?? Is V-Day OVER??

I know, I know...Valentine's Day is OVER!  BUT - I couldn't help but find a few more things to post about...ideas that I can use NEXT year.  Enjoy these cards found on Little Birdie's Secrets.


Sunday, February 15, 2009

"Loads of Love" Card


Another DAH-LIN' card from Sunny Stampin'....I am SO glad I stumbled across this blog!  I will never be "stuck" again when trying to come up with cute card ideas!  

Saturday, February 14, 2009

Valentine's Day Cookie Bouquets!!

How cute are THESE??  Found here....and highlighted on Creative Homemaker's blog.  

Homemade Heart Soaps!

LOVED these heart soaps....from Martha Stewart. You can find instructions & a supply list here.....and a video of her actually doing it here.

Friday, February 13, 2009

Simple "LoVe" Card

I just thought this was a SIMPLE, yet very tasteful...AND cute card. Found over at Capture the Moment.

Tuesday, February 10, 2009

Some of MY Valentine Projects...

I made a few little crafts for the upcoming holiday of LOVE!! This l'il beauty below was a nightmare! I didn't like my original plan...started off with a RUSTY red...NOT my color...and I wanted it to be a little darker... (OH, I first sanded the edges, obviously....huh!!)
Used a DARK brown glaze over it...
....THEN came the HEART...this gave me the MOST headache! I kept painting and repainting it....it just didn't look right with any of the colors I chose AND when I paired it up with all of my different choices of scrapbooking paper....NOT so cute! I FINALLY had to just paint the heart black to cover up past mistakes....I glittered it, added rhinestones to "jazz it up"...drilled holes through the frame, threaded the ribbon thru it, and modge-podged some scrapbooking paper onto the background. How's that for a run-on sentence?? Say, what?? Yes - the TEACHER in me is coming out....
Needless to say - I am GLAD this craft is completed! AND - my hubby said he really likes it! Siiiggghhhh!! That make it all worth it! Here is an up-close "shot" of the middle. I LOVE how it says, "love"....mixed in with the polka dots!

THIS last one is probably the most "Valentine-Y" of them all. The ribbon AND some of the stripes are HOT PINK! They don't look that bright because of my crappy camera...but they are FUN colors!

Monday, February 9, 2009

Kid's Valentines....Printables....


U Create found this on Skip to My Lou.....FUN printables for Valentine's Day! I already have the valentines for my students made....but I would love to use this one for next year! CUTE!!

Saturday, February 7, 2009

"XOXO" = NEXT PROJECT!!

Super Cute! I would LOVE to do this for our Craft Club next year!! We are done with "V-Day"...and are onto the NEXT holiday....but this is great to remember! Found this HERE. They were even wonderful enough to include instructions. What NICE gals!

MATERIALS
{4} 6"x 6" wood blocks
{2} wood X's
{2} wood O's
{2} pink coordinating papers
{14} eye hooks
{2 fl. oz.} white paint
{3} colors of coordinating ribbon

DIRECTIONS
Step 1} Paint X's, O's & wood blocks
Step 2} Cut paper to size, leaving edges exposed
Step 3} Decoupage papers onto wood
Step 4} Glue X's & O's onto decoupage-d paper blocks
Step 5} Screw eye hooks into tops & bottoms of wood
Step 6} Embellish with ribbon

Friday, February 6, 2009

Scrapbook-y Containers...

Wonderful Heartland Paper posted directions for these FUN ways to package GOODIES...great ideas for V-Day....yet, they can be created for any holiday or special occasion.


CuPcAkE BoX

Supplies Needed:
1-12X12 Cardstock for box base
Decorative patterned paper for dressing up finished box
Pieced cupcake (made freehand from cardstocks)
Die-cuts or sticker letters for “Sweet Thing” Title.
Cardstock for band
Adhesive
Scor-Pal tool or other Scoring system
Scissors or craft knife

Instructions:
1. Follow the detailed instructions for the “Origami Box” that can be found by following this link to the scor-pal site:
http://www.scor-pal.com/dec2_magazine/index_files/Page1187.htm
You can click and print the tutorial that will walk you through each step to make the box base. Don’t get overwhelmed when you first read the instructions. It is very simple to make if you just take it one step at a time.
2. Once you have completed the box base, decorate the box with patterned paper, cutouts, and letters.
3. Make a band for the box by cutting a 1 ½” strip of cardstock or decorative paper and wrapping it around the box seam.
4. Place a cupcake inside the box and give to someone you love!


PuRsE BoX

Supplies Needed:
Cardstock for box base
Paper for dressing up finished box
Heart Die-Cut for decorating
Button
Eyelets for attaching handle
Ribbon to tie on handle
Cardstock for handle
Adhesive
Scor-Pal tool or other Scoring system
Scissors or craft knife

Instructions:
1. Follow the detailed instructions for the “Batty Boo Box” that can be found by following this link to the scor-pal site:
http://www.scor-pal.com/oct_magazine/index_files/Page640.htm
You can click and print the tutorial that will walk you through each step to make the box base. Don’t get overwhelmed when you first read the instructions. It is very simple to make if you just take it one step at a time.
2. Once you have completed the box base, fold a small strip of paper along the same vertical dimensions as you did the box base. This paper will wrap around the top of the box to create a band of color. She border-punched the edge of this strip to give it a lacy effect.
3. Make a handle for the box by cutting a 1” strip of cardstock or decorative paper and attaching it with eyelets to the sides of the box.
4. Add buttons, hearts, ribbon or other embellishments to decorate the box.
5. Fill with a yummy treat and give to a friend or loved one.


PyRaMiD BoX

Supplies Needed:
Cardstock for box base
Paper for dressing up finished box
Eyelets for attaching ribbon
Ribbon to tie on handle
Adhesive
Scor-Pal tool or other Scoring system
Scissors or craft knife

Instructions:
1. Follow the detailed instructions for the “Exploding Pyramid Box” that can be found by following this link to the scor-pal site:
http://www.scor-pal.com/dec2_magazine/index_files/Page325.htm
You can click and print the tutorial that will walk you through each step to make the box base. Don’t get overwhelmed when you first read the instructions. It is very simple to make if you just take it one step at a time. *It is not necessary to build all of the layers of the exploding box unless you want to.
2. Once you have completed the box base, you can cut patterned paper to decorate the outside of the box.
3. Fill with a yummy treat and give to a friend or loved one.


CaNdY NuGgEt BoX

Supplies Needed:
Cardstock for box base
Paper for dressing up finished box and nuggets
Ribbon
Adhesive
Scor-Pal tool or other Scoring system
Scissors or craft knife

Instructions:
1. Follow the detailed instructions for the “Candy Nugget Boxes” that can be found by following this link to the scor-pal site:
http://www.scor-pal.com/basics/index_files/Page406.htm
You can click and print the tutorial that will walk you through each step to make the box base. Don’t get overwhelmed when you first read the instructions. It is very simple to make if you just take it one step at a time.
2. Once you have completed the box base, you can cut patterned paper and ribbon to decorate the outside of the box. She also decorated each nugget with patterned paper to match.
3. Fill box with nuggets and give to someone sweet!

Thursday, February 5, 2009

What Does That Spell??

Don't mind my SUPER blurry pics.....Can you guess what this spells?? Awwww....OK....here's a clue.... it has something to do with Valentine's Day!
You are getting closer.....

I know, I know....you just ADORE the rhinestones on the "O"....I am SOOO blushing right now!!

Ya got it??

YES - that is a lock & key....AND the tiny metal embellishment on the right spells, "love" as well!

We made these blocks at our last "Gettin' Her Craft On" Club get-together!

YEP - you can give l'il ole ME the credit this time! :)

Tuesday, February 3, 2009

Altered Candle for V-Day...

I am LOVIN' altered candles! I have already done TWO sets....to SOON be featured on this blog...and I like the "holiday spin" this gal did. Tip Junkie featured her a few days back...

Don't worry...I will show mine soon....I am just a perfectionist AND I am looking for the PERFECT candle holders before I snap the photo!!